WordPress : How To Highlight Syntax Code Without Using Any Plugins
There are many WordPress plugins for highlighting programming code. Until now, I have used Crayon Syntax Highlighter on this blog and was satisfied with it, but at the time of the writing, the plugin was last updated more than 2 years ago, so I started looking for the non-plugin alternative. In the end, I chose to use Google code-prettify library. This article will show you how to implement this library into the WordPress and how to make it more versatile by using few CSS tricks.
At the moment, the WordPress plugin page for Crayon Syntax Highlighter is showing the following message:
It's never a good idea to have plugins that are no longer supported and the code-prettify library from Google is a good alternative. The library will do pretty good job on C based languages, JavaScript, HTML, while for other special case languages like F#, Scala, they are supported using extensions. Check the Prettify GitHub page for more information.
First, let's compare it with Crayon Syntax Highlighter, so you could have a better idea if the
Pro's
- More lightweight.
- Overall page size will be reduced.
- Simpler to use as all you need is to insert a class name into a
<pre>tag. - It is a project from GitHub, so it should be always up-to-date as oppose as the WordPress plugins, where often they rely on a single developer to maintain it.
- The library is used by very popular websites like StackOverflow.
Con's
- Less accurate Syntax detection.
- As it is not a plugin, you need to do HTML encoding yourself.
- No native line highlighting support.
Step 1 - Setting code-prettify for WordPress
The library itself can be found on GitHub, but to set up the code-prettify to work with WordPress, we just need to add following line into
header.php template file inside the <head>tag before <?php wp_head(); ?>.<script src="https://cdn.rawgit.com/google/code-prettify/master/loader/run_prettify.js"></script>
Step 2 - HTML Encode the syntax code you want to show in your post
Next, we need to HTML encode our syntax code inside the post, as certain characters have special meaning in HTML and the browser will interpret them as a part of the HTML. The easiest way to achieve this is to find some online HTML encoder, like this one (shown below):
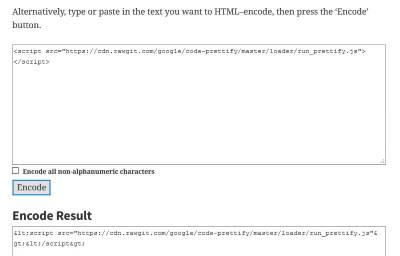
mply copy your syntax code inside the windows and click the 'Encode' button. You can leave the checkbox about converting all non-alphanumeric characters unchecked. Copy the encoded version from "Encode Result" window and paste it into the post editor in the WordPress.
Step 3 - Enabling the Google Prettify on the syntax code
After we copied the encoded syntax code, we need to do two things:
- Wrap it with
<pre>tag. - To make the highlighter work on the
<pre>tag, we need to add aclass="prettyprint"to it.
For example, if we want to show the following snippet of code:
function MyFunction( $result, $url )
{
...
}
Then in our post editor, the code would look like this:
<pre class="prettyprint">
function MyFunction( $result, $url )
{
...
}
</pre>
and it is it , its all set and done .